How do I use my Mac’s built-in microphone or connect an external one?

Most people use voice messages, online calls or conferences via smartphone. There, it is most convenient to quickly record a message or contact someone via video call. However, in many cases a MacBook will be preferable given its screen size and ability to multi-task. For example, while participating in an online lesson on learning a foreign language, you can simultaneously open a website or an electronic textbook in which tasks are performed. And in general, during a conference in the same Zoom, it is much more comfortable to communicate with several interlocutors on the Mac display.
For the normal functioning of online communication, in addition to the webcam, you need a microphone and speakers. It would seem that all these devices are already built into the computer, it remains only to start using them. But quite often, in the process, there are problems with sound, for example, you cannot be heard, or the sound is of poor quality. Therefore, let’s deal with the intricacies of using the built-in microphone. And also, how to connect an external microphone to the MacBook.
Where are the microphones on a MacBook?
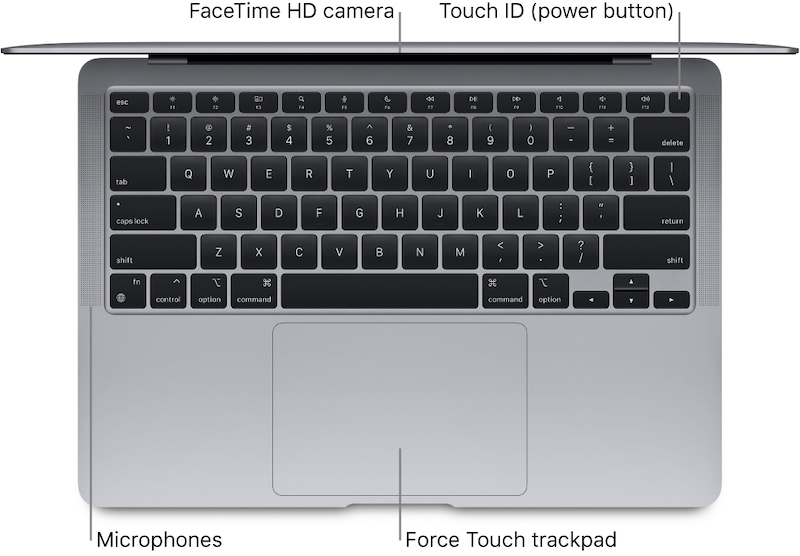
Some users mistakenly believe that there is only one microphone in the Mac. In fact, this is not the case, usually there are three. Depending on the model, the location may vary slightly, but as a rule, they are located next to the speakers. In general, knowing the exact location is not at all necessary, the microphones are designed to pick up sound in the immediate vicinity of the laptop.
Built-in microphone settings in macOS

Finding all the settings and checking the microphone is very easy. Just go to “System Preferences” – “Sound”, and go to the “Input” tab. In the window there is a volume slider, as well as a sound scale. To check the performance of the microphone, you can simply say something or look at the “Signal Level” scale. If everything is in order, you will see fluctuations on the scale. Adjust the input volume so that fluctuations do not reach the maximum mark, otherwise the volume may “go off scale”, in other words, wheeze or rattle.

Often there is a situation when one or another application does not have access to the microphone. Most likely, this happened when you forgot to give the program access to the microphone during installation.
Solving this is easy:
- Go to System Preferences.
- Select the icon “Protection and security” – “Privacy”.
- Click on the lock at the bottom of the window and enter the administrator password.
- In the left panel, find “Microphone”.
- Check the box next to the apps you want.
- Close the padlock.
How to Connect an External Microphone on a Mac?
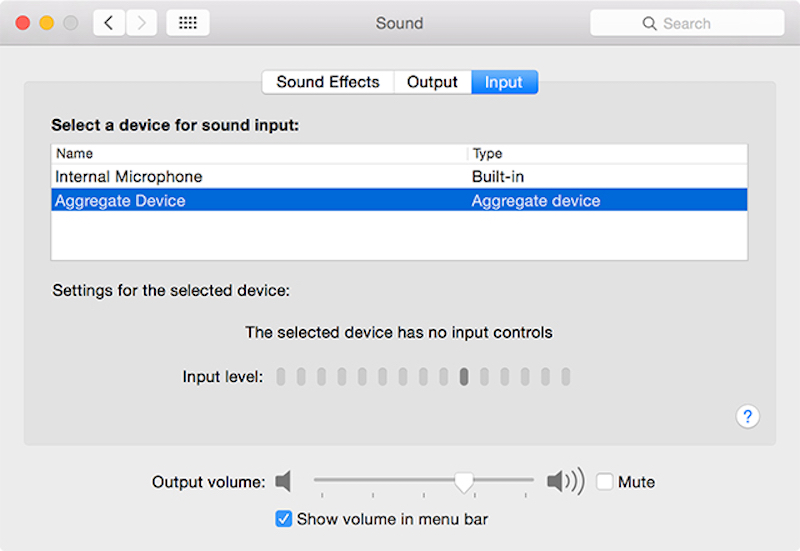
If for some reason the quality of the built-in microphone does not suit you, you can connect an external one (or headphones with a microphone). It can be a device with a USB connector, or a 3.5 Audio Jack (if your model has this connector) or even Bluetooth. As a rule, such devices are connected automatically and no software installation is required. To switch from the built-in microphone to an external one, you still need to go to the sound settings in the system settings, and select the desired device on the Input tab. Or click on the settings icon in the top menu bar and select “Sound”. Here we click on the line “Sound Settings” and get into the same menu.